David Earle - Turning Wooden Tops

Tops have been played with for thousands of years on every corner of the planet. They have been used to keep warm, to pass the time, and to help explain how our world works. Tops have religious significance for some, others use them to gamble. They have the power to mesmerize us all.
I've made plenty of these things over the years. May this guide help you have more fun at the lathe.
Tools:
I use a 5/8” high speed steel bowl gouge for shaping my tops. This tool can take heavy cuts further from the tool rest so I don't waste time moving it. The skew chisel and parting tool come in handy for tight corners.
Guidelines for a top that spins well:
Material
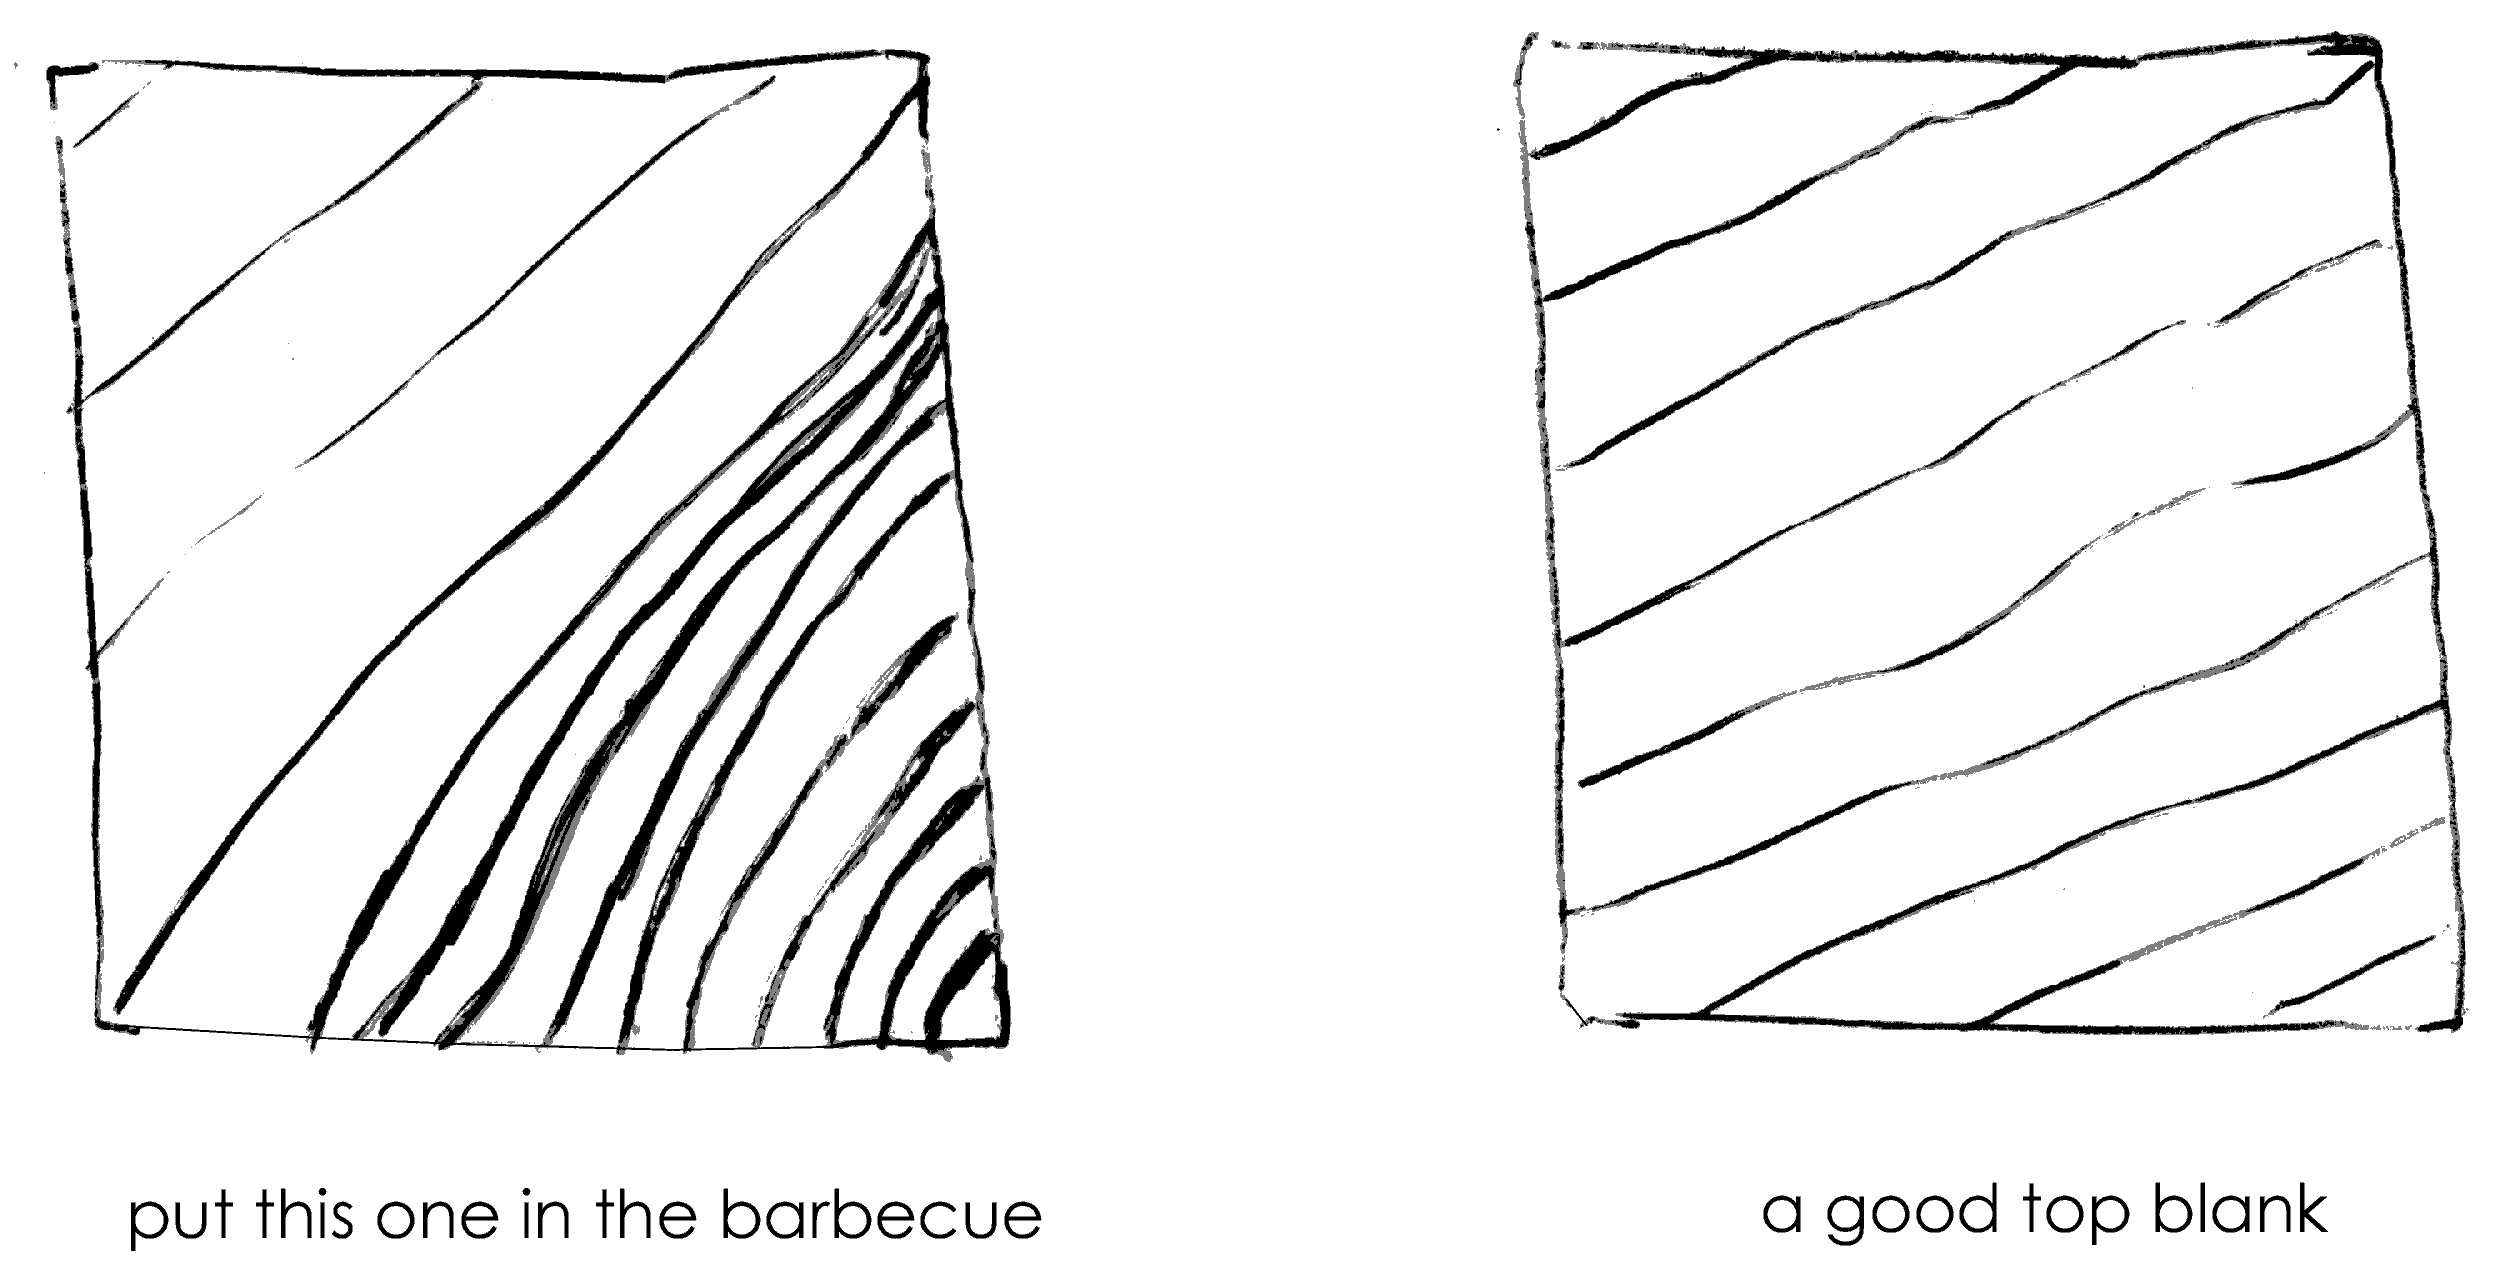
A well balanced top requires dry material. If using green timber, one year of air drying should work for 2" x 2" blanks. Place wood stickers in between rows to ensure air circulation. Protect your stack from wind and rain, but allow some air circulation, ventilating more as the months go by. Plywood or sheet metal scraps make a good roof. Bungee cords are just the thing to keep it from blowing away.
Begin drying wood in the fall when possible. Hot summer winds cause excessive checking in less stable species.
Once dry, turn them into cylinders with tenons to fit your chuck jaws. Cut 1/2" longer than the finished top and toss loosely in a box. Be careful when cutting round things. Use sharp blades sharp and cut slowly. Use a sled to keep them from rolling on your bandsaw. Leaving some flat areas will make them safer to cut with a chop saw. I keep these in a conditioned environment for a month before using.
Your blanks should be in line with the grain and made from consistent growth. Fast growth and slow growth on different sides of a top will throw it out of balance. I don't waste time working with rotten, knotty, figured, unbalanced, or cracked blanks. Even with perfect material I toss the 5 -10% that don't balance well.
This doesn't mean you can't make tops with imperfect stock. For me, it's a way to make a living. I can't compromise on quality if I am to separate myself from the cheap mass-produced tops. When a nice looking top doesn't spin well I often drill a hole in the stem and give it away as a Christmas tree decoration.
It's safer to rough out blanks between centers before fixing in a 4-jaw chuck. I often take a shortcut here, but only with lots of safety equipment. Never underestimate the ability of a tiny piece of wood to do serious damage to your face. I once had a small chunk of maple fly off the lathe and crack my face shield in half. I do not recommend fixing square stock in a chuck without tail-stock support.
Woods that machine well and have small pores are ideal for small tops. Madrona is my favorite, followed by Cherry, Pear, Holly, Plum, Bigleaf Maple, Oak, Beech, Mulberry, and Locust, ect. (In that order)
Shaping the Point:
Sharp tips will reduce friction and make the top spin longer – especially on smooth surfaces. However, a tip that is too sharp will dent or wear out quickly. This may cause the top to hop up and down or vibrate.
Rounded tips will float more and allow the top to move around – this can be fun on a wooden floor.
For my little table-top spinners I cut a 45 degree cone, then round off the last 1/16” or so.
String-launched throwing tops are a lot of fun, but should be played with outdoors. I make high carbon steel tips and leave the end a sharp 45 degrees. This makes it easier to do certain tricks – like let the top run up and down my arm.
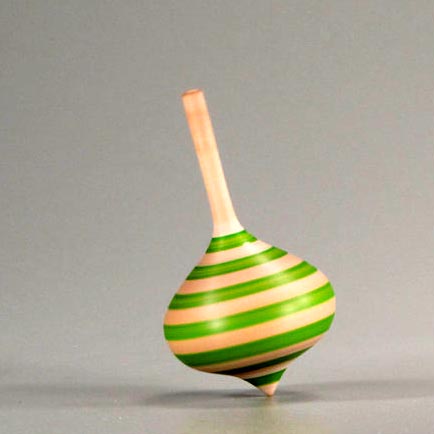
Top Body:
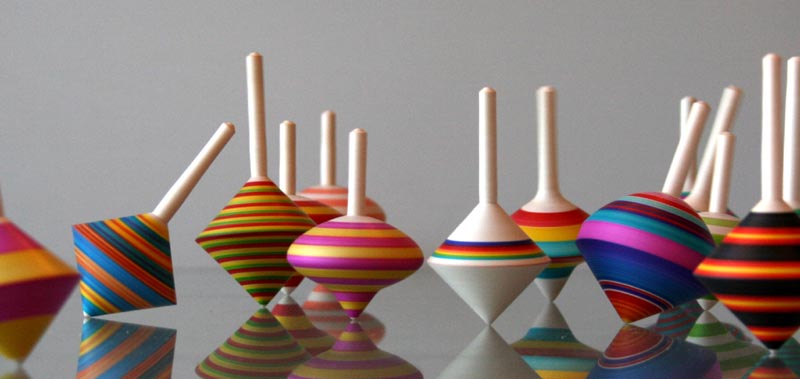
Let your imagination run wild! There are thousands of different shapes out there. I recommend serious experimentation. This is the only way to find out what you really like. Look to nature & the endless variety of man-made objects around you.
Tops can be made very tall, but they usually won't spin as long and beginners may have trouble getting them going fast enough. It takes good balance and high speed to keep a tall top upright.
Short and medium height tops tend to work well.
The stem:
Practice makes perfect when it comes to shaping a slender stem. Always cut away from the unsupported side of the blank, towards the head-stock. Do not push toward the center, as this will bend the wood & result in undesired chatter or premature parting-off. You want to cut in the direction of the lathe bed, from right to left.
A tiny stem will take too much finger strength to get it going. Too large and it won't spin fast enough. It's all about gearing. A ratio of 1/7 is a good rule of thumb. (1 being the diameter of the stem, 7 – the diameter of the top body). This can vary depending how much mass the top has, and where the mass is located.
Make stems at least 3/4” tall. One inch is better. Any shorter will make it hard to spin. Very tall stems can be made – allowing the tops to be spun between palms.
I like to point the tip of the stem for spinning upside down. As with many small chucked projects, make sure to leave a tiny stub on the end when parting off with the skew. This can be carved away afterward. If you don't leave this the end grain will tear out.
Finishing:
Sanding isn't necessary with sharp tools and practice, but it does help if you want a finished appearance. Novice turners might start with 180 grit. I like to use 320 or 400.
For a natural finish, wipe with food-grade walnut oil or boiled-linseed oil.
A french polish is a quick way to get a perfectly shiny finish. I've heard it described as 1-part walnut oil to 1-part shellac cut with 1-part alcohol. Personally, I cut the walnut oil to ˝ a part...
Mix this up thoroughly in a jam jar, lower the lathe speed (or rotate by hand), and use a clean lint-free cotton rag to slop it on. Continue to wipe around the piece & gradually raise the speed as it soaks in. It takes a little practice, but you sort of buff it, and the heat helps the finish to set up. Don't press too hard. Use a clean portion of the rag for a final gentle buffing. I like to leave the work on the lathe to dry for 10 minutes or more before gently removing it.
This is a lot of effort for a low-priced item, so I am more likely to put this finish on a turned box.
I like to decorate my tops with felt-tipped markers. Lower the lathe speed so you don't melt the tips. When you are finished coloring, raise the speed and use a paper towel to wipe off excess ink. The downside to the markers is that some inks (particularly the reds) fade in sunlight.
Bonnie Klein uses chatter tools in combination with ink and paint markers to get spiraling effects. Acrylic paints and lacquers can be nice as well, but I am still working out an efficient way to do this without wasting paint. Dipping them is probably the solution.
Wire burning is a quick and durable decoration – just make sure to turn a groove first to pull the wire into. My friend Lisa creates beautiful patterns on my tops with her wood-burning pen.
Food-grade walnut oil will bring out the grain – it's easy to wipe on and will dry overnight.
My favorite thing about making tops is the wild array of shapes & colors you can create. Introducing youngsters to them is always a treat too. In a world full of mass-produced plastic junk, I made it to the age of 23 before ever seeing a decent top. They are also tons of fun to collect, as they are small, inexpensive, and available in any country.
>
Print a condensed version of this guide.
Check out a video of me making one of my onion-shaped tops!